What this is
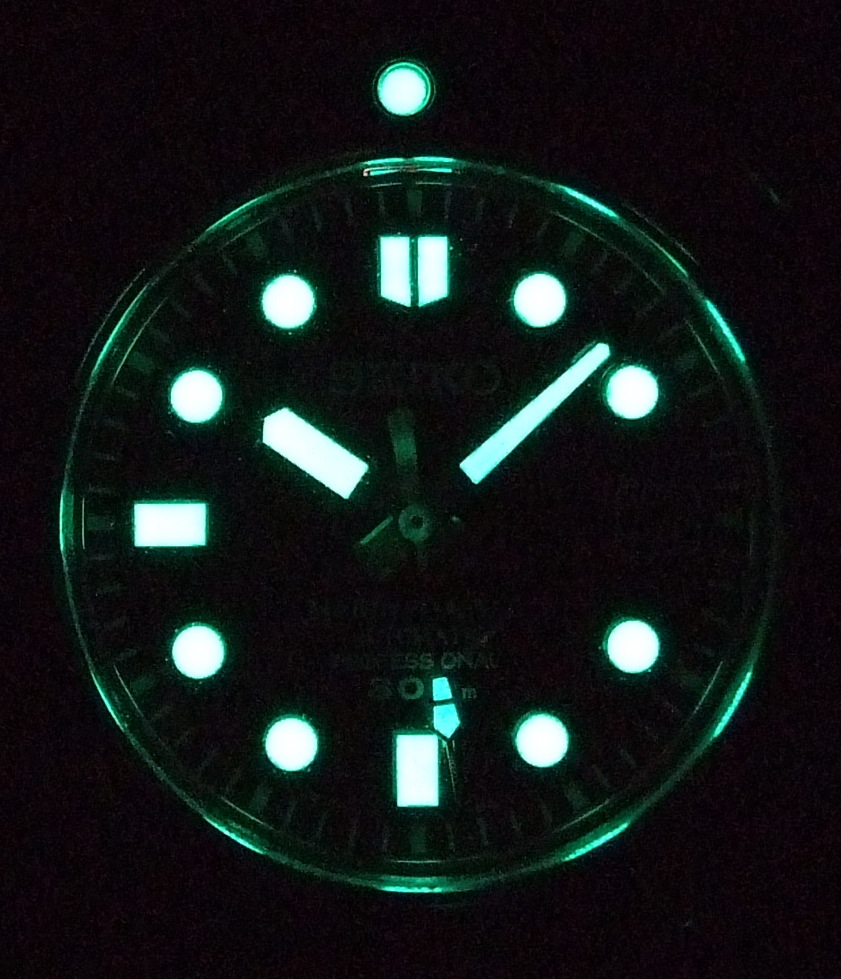
This is a how-to on building your own inexpensive LED lamp to illuminate watches for lume photography and measurements. It's got two stages, one involving no effort, and the second involving soldering, wiring and a few other simple skills. The final product is useful for lume photographs, luminosity measurements and seeing just how bright your watch can glow.The problems solved here
My photometer needs light to charge the lume on the watches. The ISO spec calls for
D65 (daylight spectrum) lamp at either
- 200 lux for 30 minutes or
- 400 lux for 20 minutes
200-400 lux is approximately that of a well-lit office, by way of reference. I talked to photonics expert Steve Newsome, who has built precision light sources, and he told me that approximating a D65 lamp with LEDs was basically impossible.
Plan B was to use a series of neutral glass filters. By using real sunlight as the source, and a stack of grey glass, we could get a perfect version of 200-400 D65. I have the filters, and plan to try this. However, for now here's the winning Plan C:
We'll come back to what this is and how to build it by the end of this tutorial.
Part One: Lume tripod and camera holder
One of the problems for watch photography is taking lume pictures. You need
- A light source to charge the lume
- A camera holder (typically a tripod) to hold the camera steady for a long no-flash exposure
- Darkness, as close to perfect as possible.
Here's a single $10 solution to 2 out of 3 of the above:
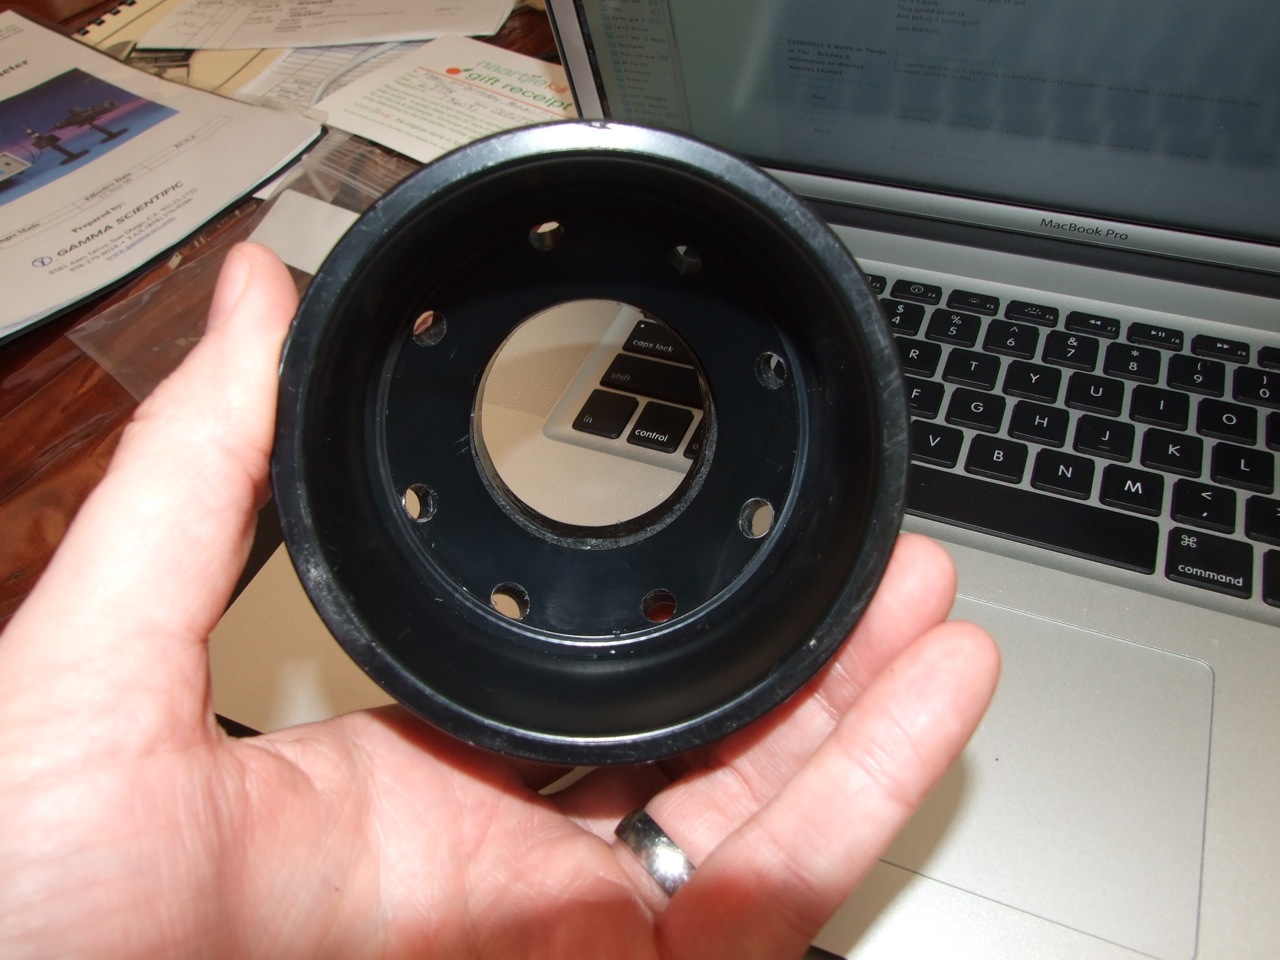
It's a simple ABS plastic plumbing part from Home Depot, namely a 2" to 4" flange. Here (getting ahead of myself) I've drilled eight holes in the bevel, but the stock part is most of what you need. Placed on a flat surface, it's big enough for any watch, completely opaque and doubles as an excellent camera holder for results like this:
Highly recommended!
Part two: Light the lights
Since a D65 lamp is infeasible, my previous research had led (pun intended) to UV light emitting diodes. These 375nm diodes from Parts Express (Amazon page)
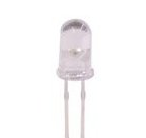
Specs:
- 20mW
- 30 degree viewing angle
- 375 nm
A bit of estimation convinced me that, mounted in the bevel, a 30 degree beam would illuminate most watches nicely. To avoid shadows and hotspots, I went with 8, equally spaced around the flange.
Actually, I bought nine, not eight - always good to have one to mess up.
(I originally designed a circuit with 100 ohm current-limiting resistors, but when built a test LED, it was super-dim. ('UV' LEDs have significant emission in the visible spectrum.) I suspect that these have an integral resistor, as when I connected one directly to 5VDC it never even got warm. A plain LED would have gone into thermal runaway.)
Other parts needed:
- Soldering iron & solder
- Wire cutter and stripper
- A few feet of connector wire, say 18-22 gauge
- 5VDC power supply. I grabbed a wall wart from my parts bin, from an old USB hub. It'll crank out 2.5A, way more than required.
- Wire
- Black tape
- Wire ties, when done, to secure the power supply wire against tugs
- Work surface - I used a spare chunk of 1x6" lumber that I could burn and scratch.
- Drill and bits
- Hot glue gun and glue (recommended but not required)
Procedure
- Drill eight equidistant holes, just large enough to hold an LED. (Result should look like mine, above)
- You want to solder all 8 LEDs together, in parallel, like a ladder. All plusses together, all grounds together. I used small-gauge copper wire, solid. I found it faster to cut and strip the pieces before soldering.
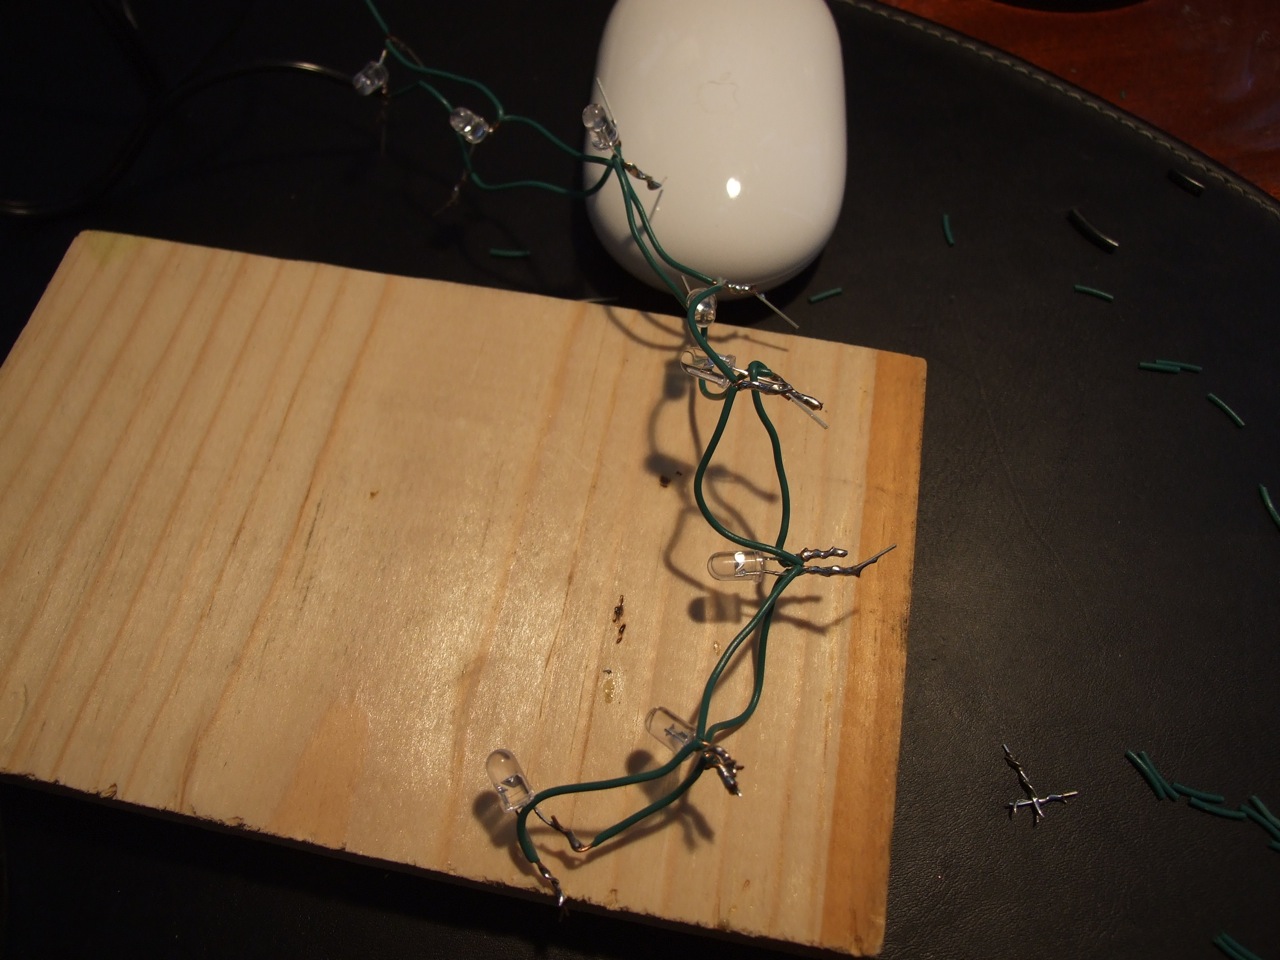
- You want to work the LEDs into a circle that'll wrap around the plastic. Here I'm checking fit as I work:
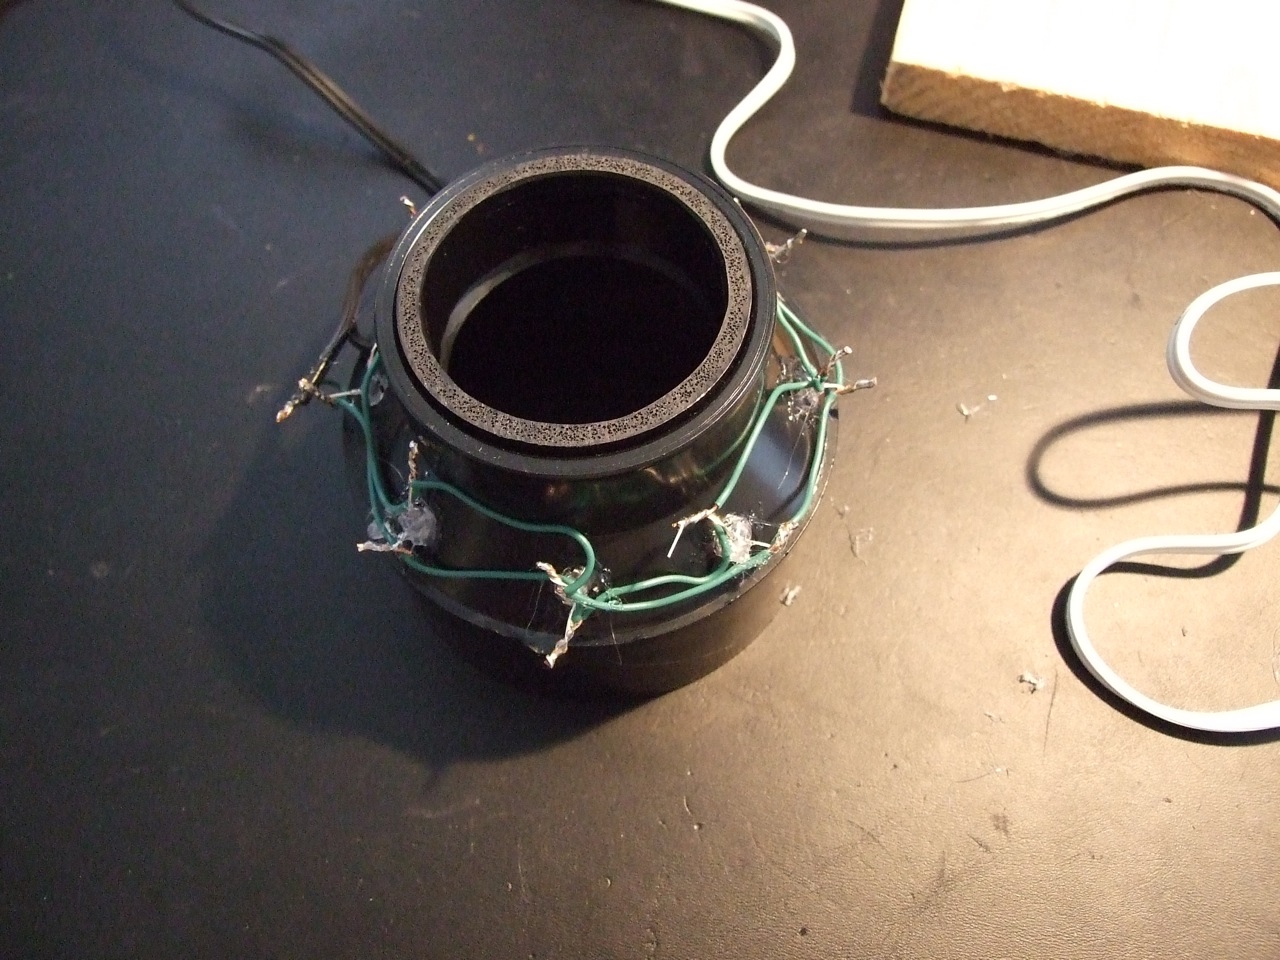
- Solder the LED chains to the power supply
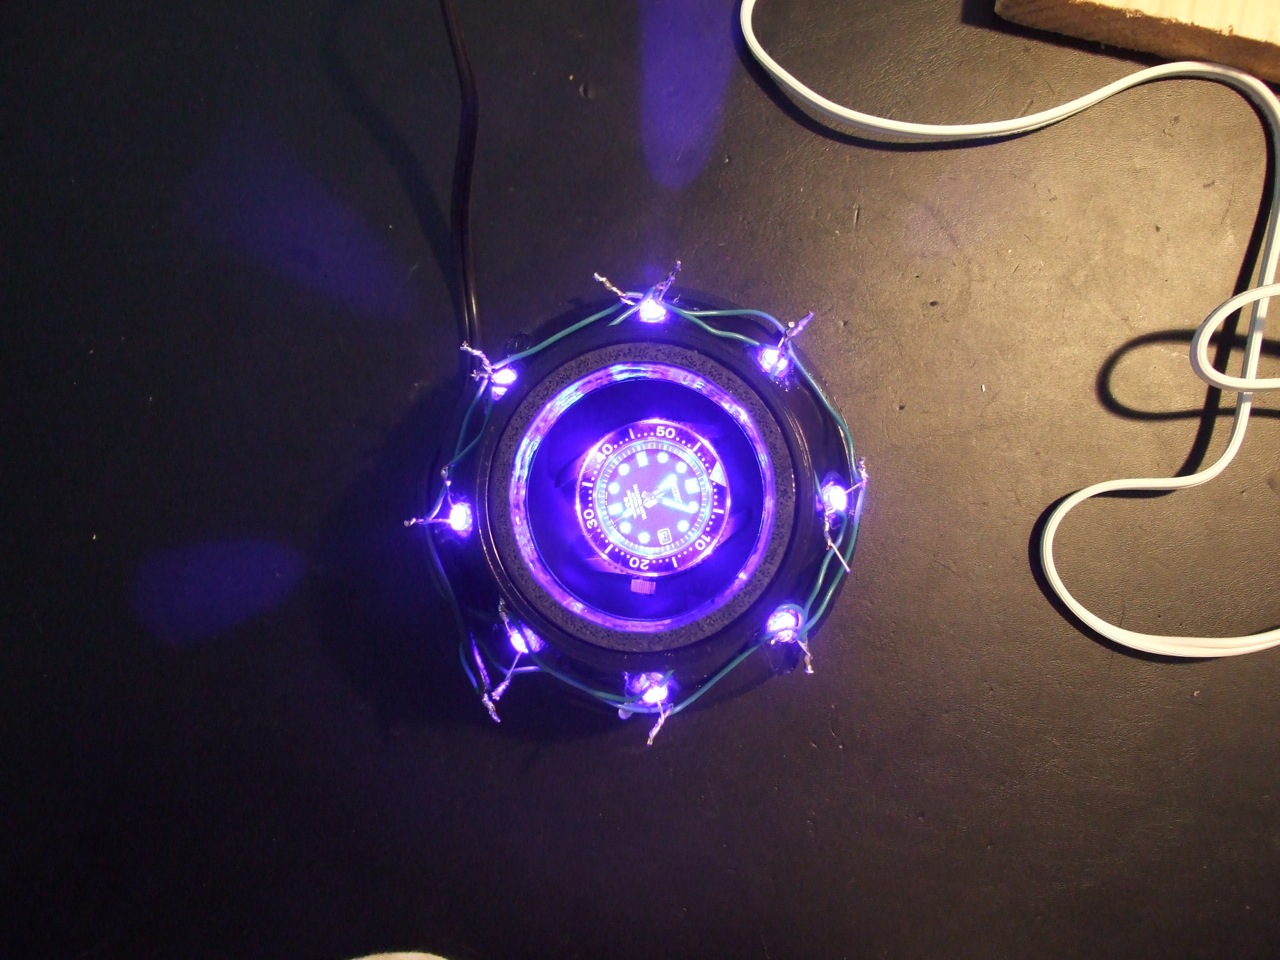
- Hot glue the LEDs in place. Here's a shot of them all lit up:
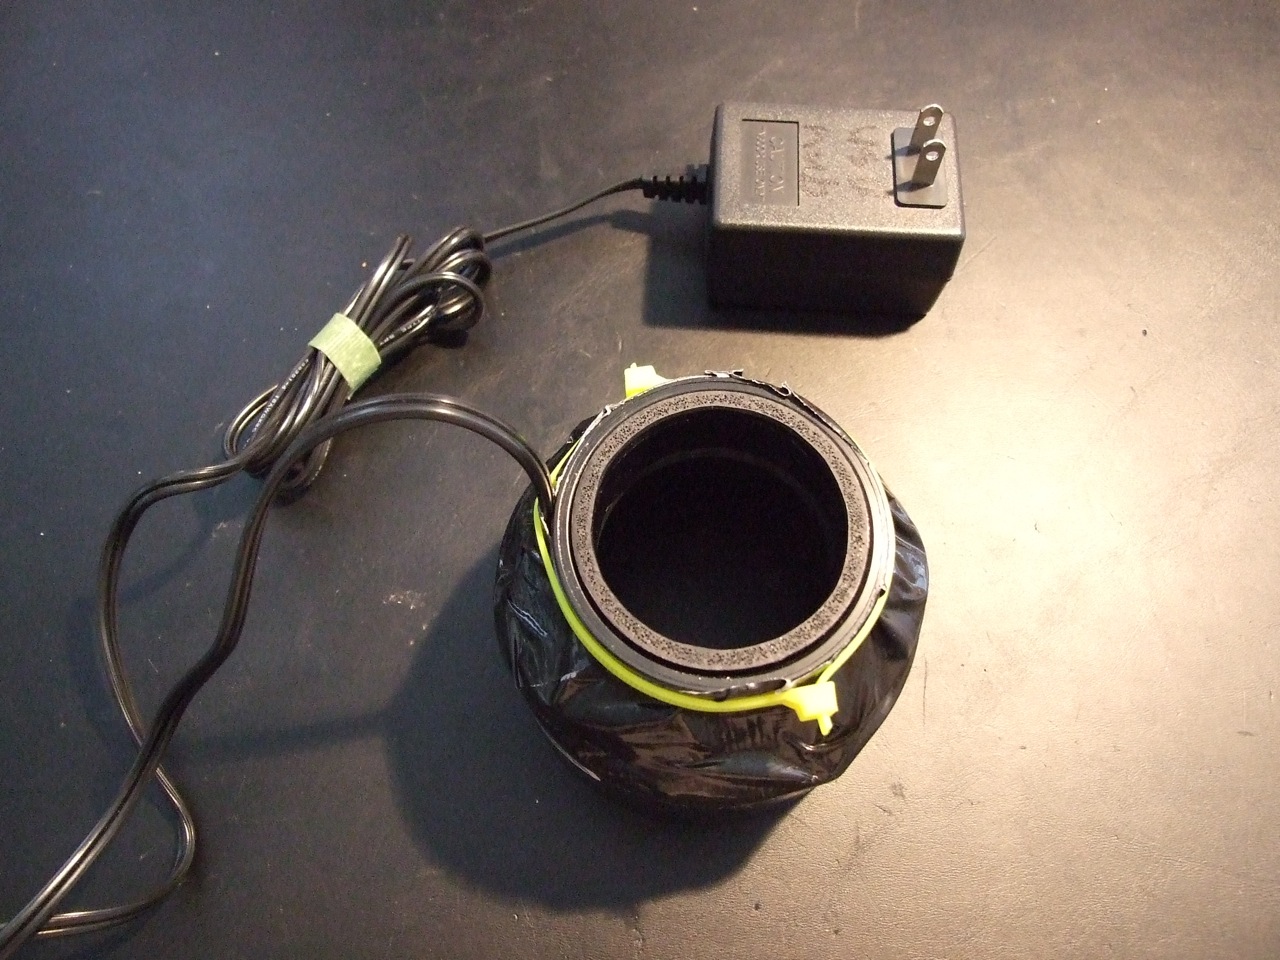
- Cover the outside of the LEDs with black tape. This prevents light outside from infiltrating and ruining your pictures, and also keeps the UV light inside.
- Secure the power supply wire with wire ties as strain relief.
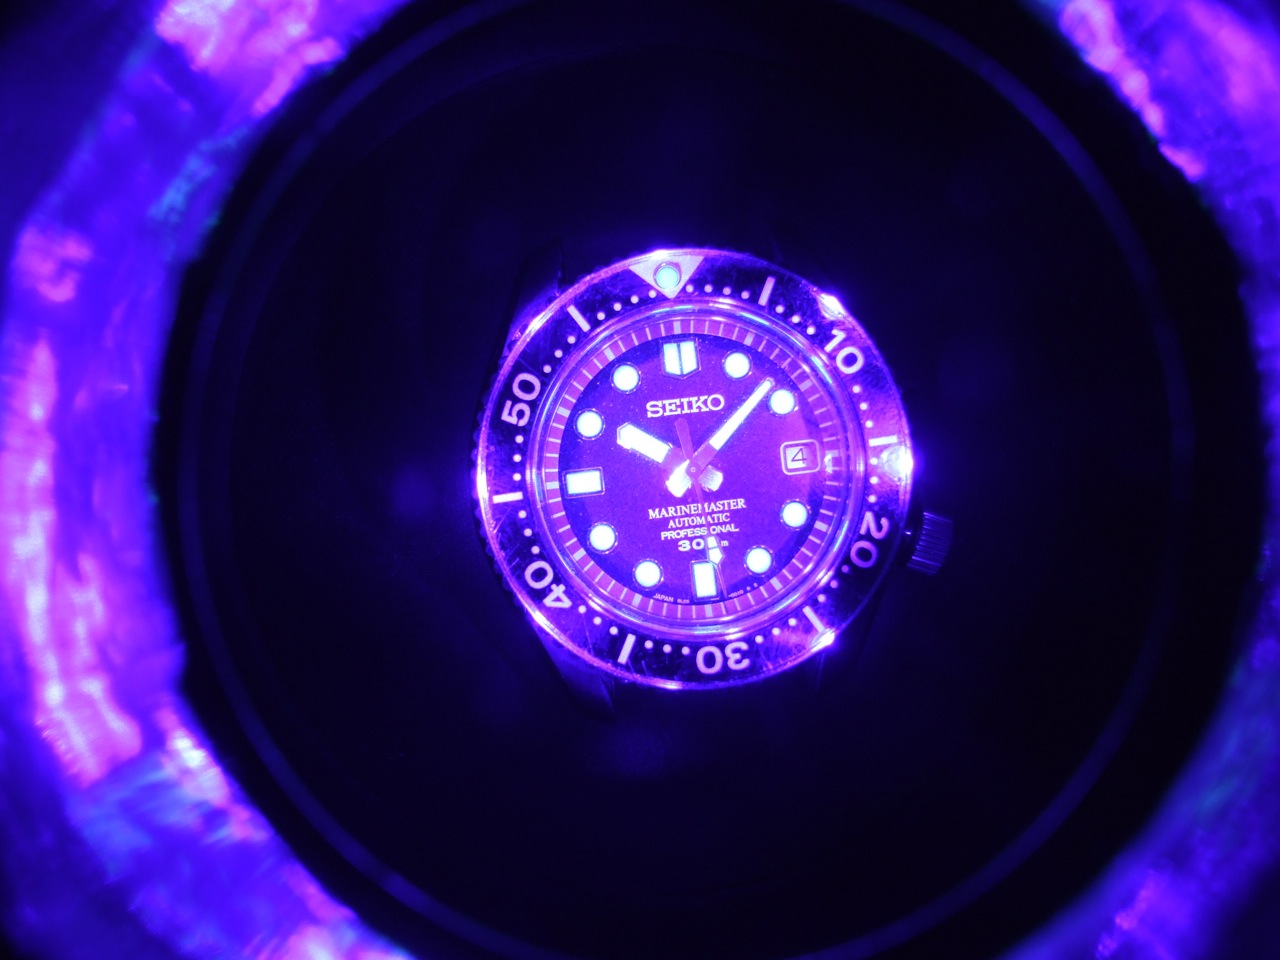
- In action:
Total cost: 25 for LEDs, 10 for the pipe fitting, the rest I had in my parts bins. Even if you don't build the LED portion, I highly recommend the pipe for straight lume photography. It's the best thing I've found to date.
You can also add a sheet of black foam core sheet from any hobby store. Rest the watches on that; it prevents scratches and light leaks. About a dollar.
Results
Here's first-light data. I charge my Marinemaster (best lume I have) for about 90 seconds, and took a long photometer run. Compare it on this plot to the sunlit data, the UV data is a better power law fit, and much higher initial brightness. Interesting!
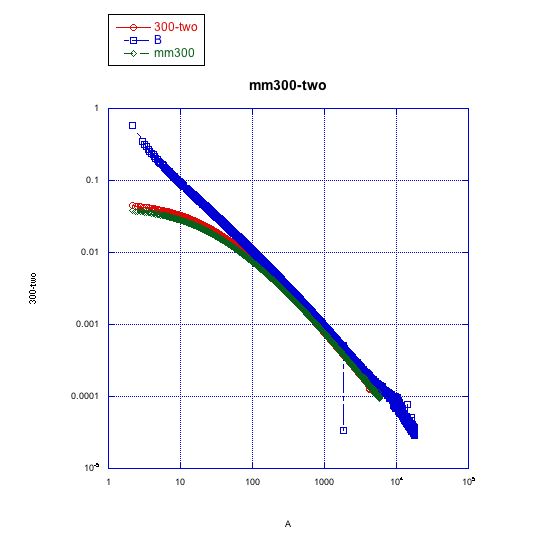
(The UV curve is blue)